As the Common Crane (Grus grus) is migrating back to their breeding area, it’s time to set up your own Crane server. Crane is a new open source product to host data science artifacts: data analysis reports, documentation sites, packages and libraries, you can read the introduction blog post here. This post provides a simple setup to get started with Crane using Docker Compose.
First of all, make sure to install Docker and Docker compose. Next, prepare the docker compose setup:
create a new directory called
craneandcdinto it:mkdir crane cd cranecreate some example data:
mkdir data
mkdir data/project1
mkdir data/project2
echo "This is a demo of crane!" > data/project1/file1.txt
echo "This is a demo of crane!" > data/project2/index.html
create a file
docker-compose.ymlwith the following content:services: crane: image: openanalytics/crane:1.0.0 ports: - "8080:8080" volumes: - "./data:/srv/crane" - "./application.yml:/opt/crane/application.yml"
This simple docker-compose file configures the docker image to use, exposes the
8080 port, mounts the data directory and the application.yml config file.
Setup authentication
Crane can integrate with any Identity Provider (IDP) that supports OpenID Connect. Therefore it can integrate with all the common IDPs, like (Azure) Active Directory, Okta, Auth0 etc. For demonstration purposes, we integrate Crane with GitLab. Before configuring Crane, we need to create an OpenID Application in GitLab:
- login into https://gitlab.com
- in Settings, go to the Applications page: https://gitlab.com/-/user_settings/applications
- click the
Add new applicationbutton - fill in
craneas the Name - fill in
http://localhost:8080/login/oauth2/code/gitlabas Redirect URI - select the
openid,profileandemailscopes - click the
Save applicationbutton - copy the
Application IDandSecretfrom the UI - click continue
Now it’s time to create the application.yml configuration file for Crane (in the same directory as the docker-compose.yml file):
app:
  openid-issuer-uri: https://gitlab.com
  storage-location: /srv/crane/
  repositories:
    project1:
      read-access:
        any-authenticated-user: true
    project2:
      read-access:
        any-authenticated-user: true
spring:
  security:
    oauth2:
      client:
        registration:
          gitlab:
            client-id: <COPY_FROM_GITLAB>
            client-secret: <COPY_FROM_GITLAB>
            scope:
              - openid
              - email
              - profile
        provider:
          gitlab:
            issuer-uri: https://gitlab.com
Make sure to fill in the client-id and client-secret values, by using the
Application ID and Secret values from the GitLab website.
With all configuration ready, you can now start Crane:
docker compose up
After a few seconds, the line Started Crane 1.0.0 will be logged, indicating
Crane is ready to use. Open your favourite web-browser and browse to
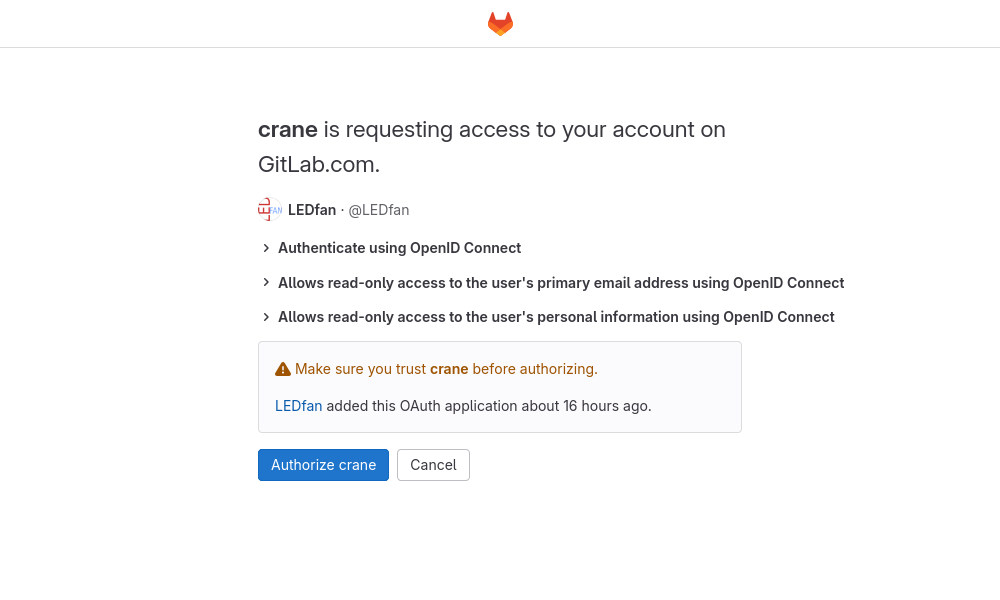
http://localhost:8080. You’ll be redirected to GitLab, asking you whether you
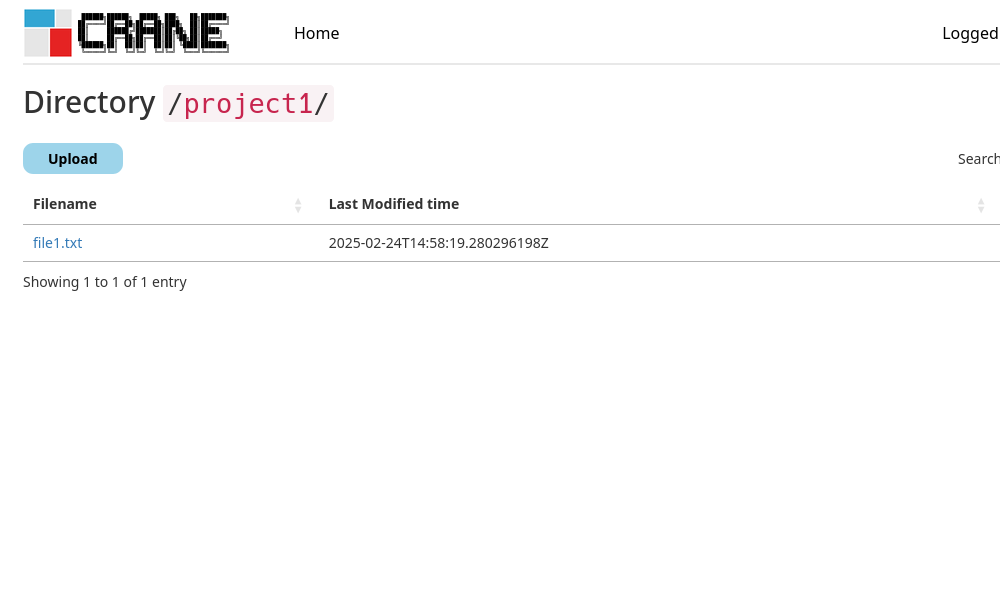
want to login into Crane:
Once you accept it, you are redirected back to Crane and you’ll see a list of repositories:

Adding authorization
In the current setup, we have two repositories configured (project1 and
project2). Both repositories contain the following authorization
configuration:
read-access:
  any-authenticated-user: true
As you may except, this gives read access to any user that can login using GitLab. If you setup Crane using the IDP of your company, this would mean that any user within your company can access the repositories.
Let’s restrict the access to project1, by listing the users that can access
the repository. Update the configuration of project1 to:
project1:
  read-access:
    users:
      - MyGitLabUsername
      - AnotherGitLabUsername
Make sure to remove the any-authenticated-user property and to list any GitLab
usernames that may access the repository. Next, restart Crane by stopping the
previous command using Ctrl+C and running
docker compose up again.
If you now open http://localhost:8080 you should still see both project1 and
project2. However, if you’d login with a different GitLab account, you’ll only
see project2. You can also specify groups instead of users. This is not
possible when using GitLab, but it’s very common when using the IDP of your
company.
Enabling upload
As a next step, let’s allow specific users to upload files using the following config:
project1:
  read-access:
    users:
      - MyGitLabUsername
      - AnotherGitLabUsername
  write-access:
    users:
      - MyGitLabUsername
Once you restart Crane, the user MyGitLabUsername will be able to upload files
using the UI or API. All other users will not have upload permission.
Adding a public repository
Although protecting your data is important, you may also want to host some public documentation. Crane allows you to easily host this together with all your private data. As an example, we will host the documentation of the bayesplot package. Just like many other R packages, the documentation is built using pkgdown.
first clone the documentation in a new directory (outside the
datadirectory):git clone -b gh-pages https://github.com/stan-dev/bayesplot/ cd bayesplotinstall the
pkgdownandbayesplotpackage:R -q -e "install.packages(c('pkgdown', 'bayesplot'))"generate the pkgdown website:
R -q -e "pkgdown::build_site()"copy the site to the data directory:
cp -r * ../data/bayesplotadd the repository to the Crane config:
app:
# ..
repositories:
  bayesplot:
    read-access:
      public: true
  # ...
restart Crane
The documentation is now available at http://localhost:8080/bayesplot. Note that you can update the contents of the documentation without restarting Crane.
Conclusion
This blog post explained how to easily get started with Crane. To continue learning about Crane, head to the documentation, or check out the support we offer.