tinytest2JUnit: report your tinytest results in the CI
Introduction
“Lightweight is the right weight” is the motto of packages adhering to the
tinyverse principle. One of the packages following this principle is
the tinytest package, a zero-dependency unit testing
framework. It is a nice alternative to the heavy-weight testthat testing framework, which (at the
time of writing and including its recursive dependencies) has a dependency footprint of 30 packages!
tinytest, on the other hand, has a clear focus on keeping testing simple, which allows it to stay
lightweight. As a consequence of being ‘tiny’ in nature, tinytest does not support every feature
under the sun. One of which is being able to export the tinytest results in a format understood by
continuous integration (CI) flows that can then produce a test report. This is where
tinytest2Junit enters the picture. It converts
the tinytests results into a JUnit XML format, an xml format understood by many CI/CD tools to
report tests.
tinytest2JUnit enables this conversion while staying true to the tinyverse philosophy and only has
tinytest as its dependency.
In this post, we will have a look at how to use tinytest2JUnit. Also, a concrete example for a
Jenkins pipeline is provided.
tinytest2JUnit usage
tinytests2JUnit is meant to be used in a CI test stage. There it will perform the automated
testing for you and write the JUnit xml to a specified file. Two use cases are described below.
A standard tinytest structure
If your package adheres to the standard tinytest structure. That is, all your tinytests are
written in the inst/tinytest folder. Then the easiest way for you to test and export results is
using the testPackage function.
Say your package is called PkgName and you want a JUnit xml report of the tinytests results in the
file test-results.xml. Then invoke the following R code in your test stage:
tinytest2JUnit::testPackage("PkgName", file = "test-results.xml")
This will:
- Load the specified package
PkgName. - Run the tests specified in the
tinytestdirectory of the installedPkgNamepackage. - Export the test results into JUnit xml format and save it under
test-results.xml. - Throw an error if any test failed.
Example of tinytest2JUnit testing itself!:
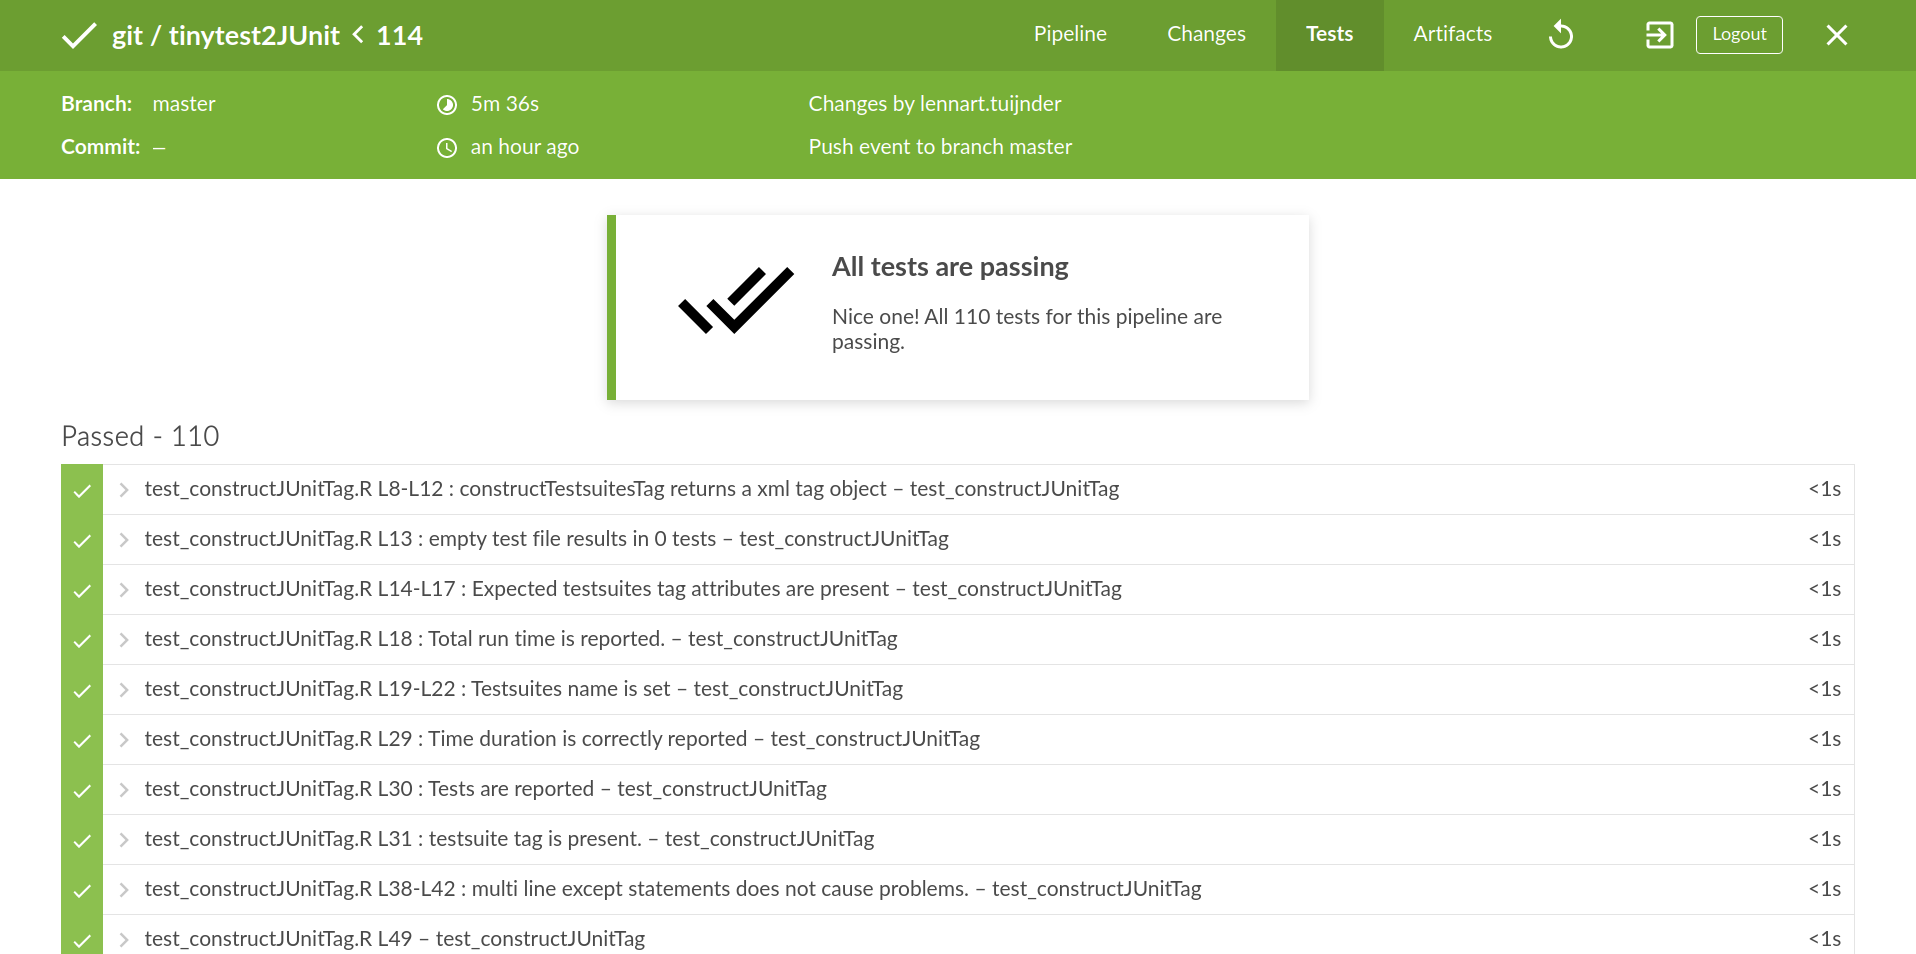
testPackage supports all the arguments of tinytest::test_package. So, if you like, you could
speed up your testing by parallelizing over ncpu CPUs. Also, just like the tinytest counterpart,
testPackage will throw an error on failure (after having written the JUnit file). This ensures
that your CI will only succeed once all tests pass. If you still want to perform some actions after
the test stage, this behaviour can be turned by setting the argument errorOnFailure=FALSE.
Another key difference compared to tinytest::test_package is that errors from test files are
caught.tinytest::test_package would have let the error bubble up and stop the testing progress.
While this behaviour is acceptable in an interactive context and we would definitely want this in
R CMD check, it is less nice in a CI environment. It implies namely that no tests from the other
test_files will be reported. Therefore, to see what went wrong, one is forced to look into the logs
of the CI.
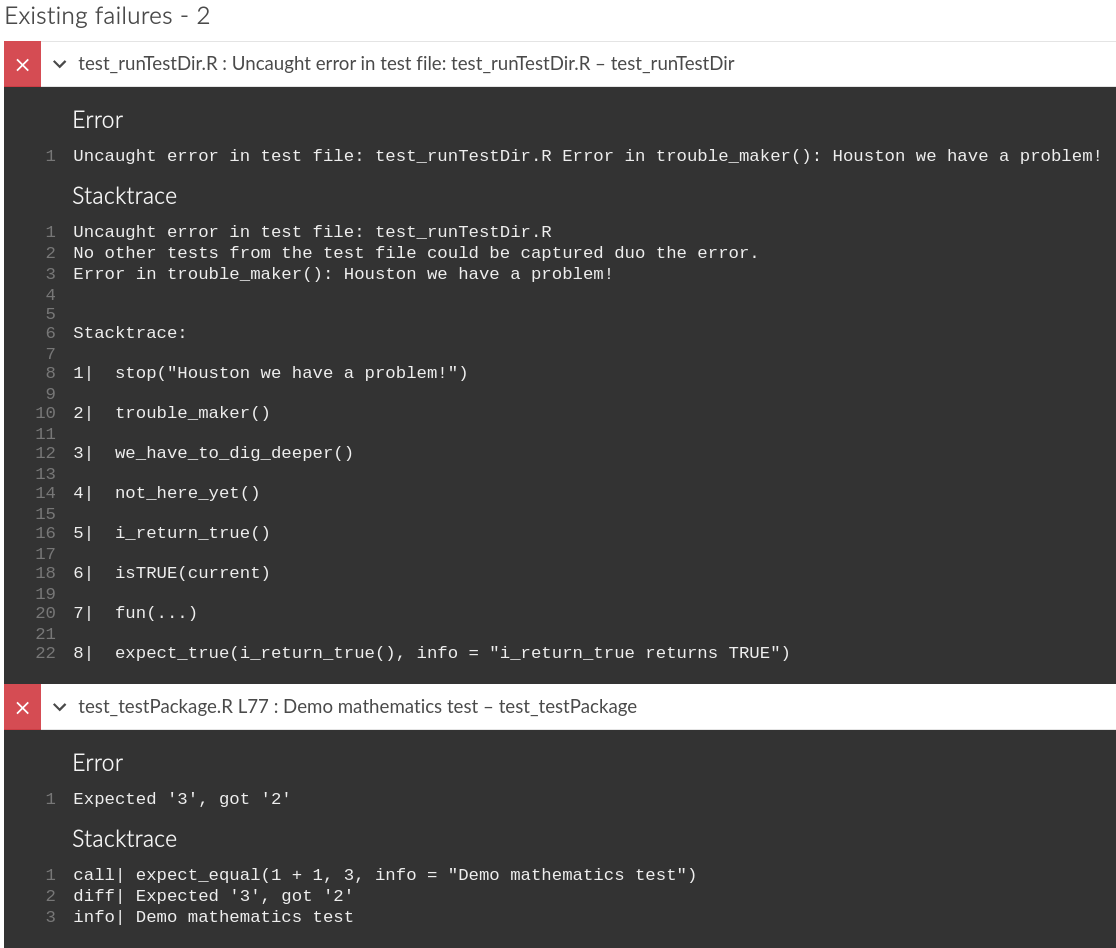
testPackage will catch the error for you and report it in the JUnit. The error will be shown next
to the test results of the other test files. On top of that, the error that has been caught will be
presented with a stack trace for more easy debugging.
Example of a caught error and a failing test:
Custom testing directories
If you have multiple directories with tinytest files to report, then runTestDir is the function
for you. runTestDir runs all the test files within a single directory and returns a tinytests
object. runTestDir can be seen as a drop-in replacement for the tinytest::run_test_dir function
but with the added benefits that additional metrics are recorded and that errors get caught.
Actually, an S3 subclass of tinytests is returned: tinytests2JUnit (note the plural) which
contains the additional metrics recorded. These include:
- Test duration per test file.
- Timestamp of when the test file was run.
- The hostname of the computer where the test was run. This is mostly useful when tests are parallelized in a cluster.
- Whether a test was disabled. A test is considered disabled when a file does not produce any test results. Since it is then assumed that some conditional statement at the top of the file made it exit early.
Note that all this info is also reported with testPackage since it uses runTestDir under the
hood.
Running the tests is the first part. We still need to produce the JUnit xml file. This is done by
the writeJUnit function, which accepts any tinytests object.
Example:
Say our package PkgName has two test directories: inst/unit-tests and inst/integration-tests.
Assume we first want to run unit-tests and, if this passes, run the integration-test.
Your unit test stage would then perform the following R code:
library(PkgName)
testResults <- tinytest2JUnit::runTestDir("inst/unit-tests")
tinytest2JUnit::writeJUnit(testResults, file = "unit-tests.xml", overwrite = TRUE)
if (!tinytest::all_pass(testResults)) stop("Some unit tests failed!")
In a subsequent integration test stage, the following code would be run:
library(PkgName)
testResults <- tinytest2JUnit::runTestDir("inst/integration-tests")
tinytest2JUnit::writeJUnit(testResults, file = "integration-tests.xml", overwrite = TRUE)
if (!tinytest::all_pass(testResults)) stop("Some integration tests failed!")
In the first step, we load PkgName as tinytest expects the package to be loaded. In the last step,
we manually stop the execution if any test fails. Both these steps are done automatically in
testPackage.
Demo Jenkins pipeline:
The code snippet below demonstrates the stages of a Jenkinsfile for a CI pipeline of an R package. The package is assumed to live in a directory called “PkgName” and follows a standard tinytest testing structure.
// Replace 'PkgName' with the name of your package.
// The R package is asummed to be in a directory called: "PkgName".
stages {
   stage('PkgName') {
      stages {
         // Generate documentation
         stage('Roxygen') {
            steps {
               sh 'R -q -e \'roxygen2::roxygenize("PkgName")\''
            }
         }
         // Build the package
         stage('Build') {
            steps {
               sh 'R CMD build PkgName'
            }
         }
         // Check the package. Note the `--no-tests` flag.
         stage('Check') {
            steps {
               script() {
                  switch(sh(script: 'ls PkgName_*.tar.gz && R CMD check PkgName_*.tar.gz --no-tests', returnStatus: true)) {
                     case 0: currentBuild.result = 'SUCCESS'
                     default: currentBuild.result = 'FAILURE'; error('script exited with failure status')
                  }
               }
            }
         }
         // Install the package and install tinytest2JUnit
         stage('Install') {
            steps {
               sh 'R -q -e \'install.packages(list.files(".","PkgName_.*.tar.gz"), repos = NULL)\''
               sh 'R -q -e \'install.packages("tinytest2JUnit")\''
              }
         }
         // Perform the testing and save the JUnit xml report under 'results.xml'
         stage('Test') {
            steps {
               dir('PkgName') {
                  sh 'R -q -e \'tinytest2JUnit::testPackage(pkgname ="PkgName", file = file.path(getwd(), "results.xml"))\''
               }
            }
            // Regardless of the outcome of the test stage. Always publish the test results.
            post {
               always {
                   dir('PkgName') {
                       junit 'results.xml'
                   }
               }
            }
         }
      }
   }
}
The Jenkinsfile example above performs the checking and testing of the fictitious package ‘PkgName’. The steps are as follows:
- Generate the package documentation with
roxygen2 - Build a
PkgName_{version}.tar.gzfile. - Perform an initial
R CMD checkto see if the package can be installed. Note the--no-testsflag. We do not want to perform tests here as we have a test stage further downstream. See additional notes below. - Install the package as well as tinytest2JUnit.
- Perform the testing using the
testPackagefunction! - Publish the test results with the JUnit plugin.
A side note about R CMD check
Since R CMD check also runs the tests, it will fail your CI build at that stage if a test fails.
In that case, no JUnit test report will be produced.
For that reason, you need to either perform the test stage before R CMD check or use the
--no-tests flag.
Warning: only use the flag if all the tests are covered in your test stage(s). You do not want
to accidentally skip any other testing in your test/ folder (eg. ‘testthat’ or plain test files).
Conclusion
In this post, we have seen how to use tinytest2JUnit to perform testing in the tinyverse and still
benefit from smooth integration with CI workflows. If you want to see how to integrate with other CI
systems than Jenkins, have a look at the
ci_examples folder in the
Github repo of the package.
Happy testing!
References
- tinytest2JUnit on CRAN: https://cran.r-project.org/package=tinytest2JUnit
- tinytest2JUnit on Github: https://github.com/openanalytics/tinytest2JUnit
- Found an issue? Report it!
- JUnit specification format: https://llg.cubic.org/docs/junit/
- tinytest project: https://github.com/markvanderloo/tinytest
- tinyverse: https://www.tinyverse.org/